Diy Nail And Yarn Wall Art

How To Make Your Own String Art Diy Projects Craft Ideas How To S
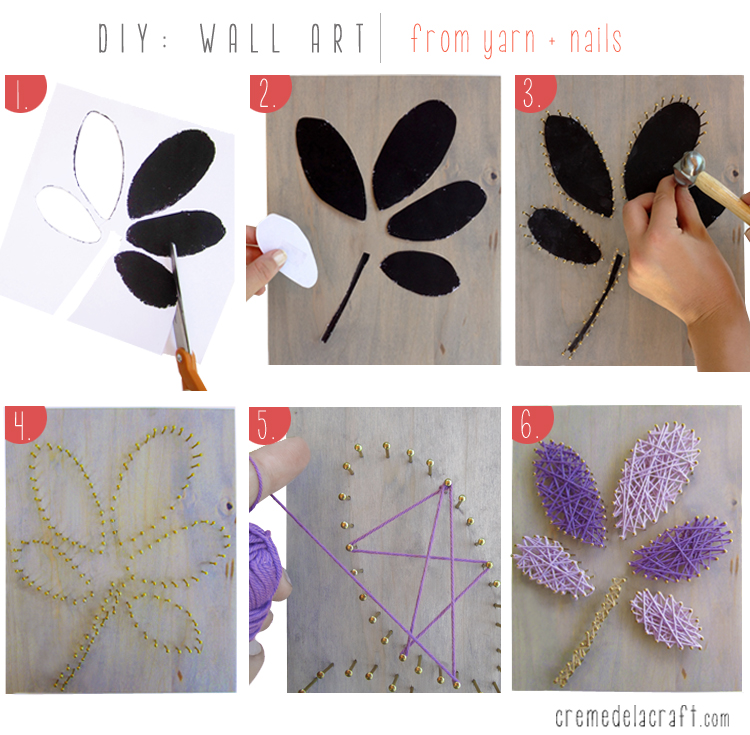
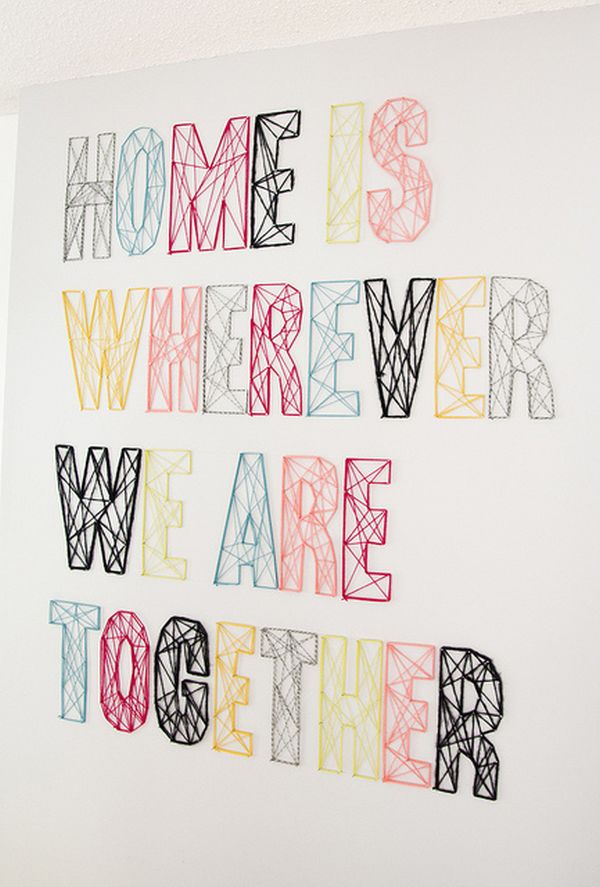
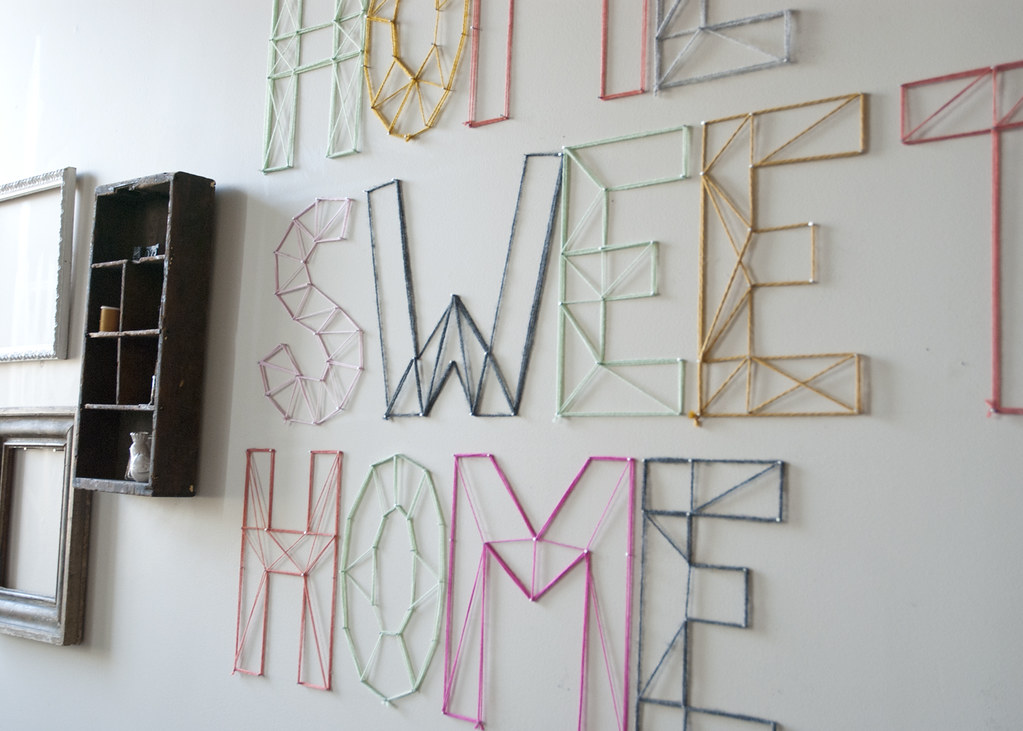
Diy Wall Art From Yarn Nails

Diy String Art Tutorial 10 Steps With Pictures

I tied the yarn to one of the nails and then just started wrapping.
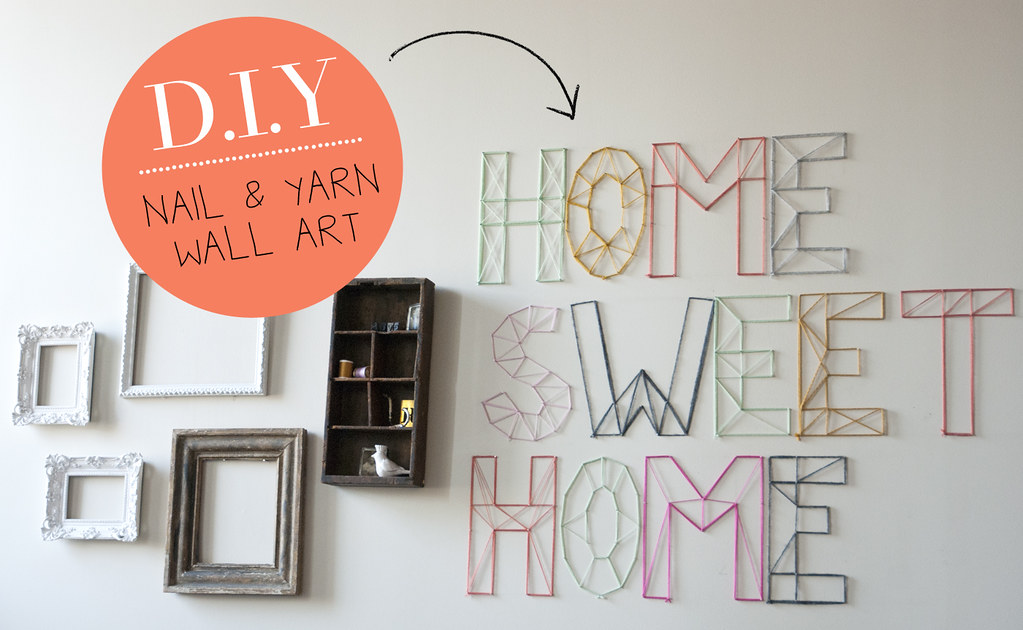
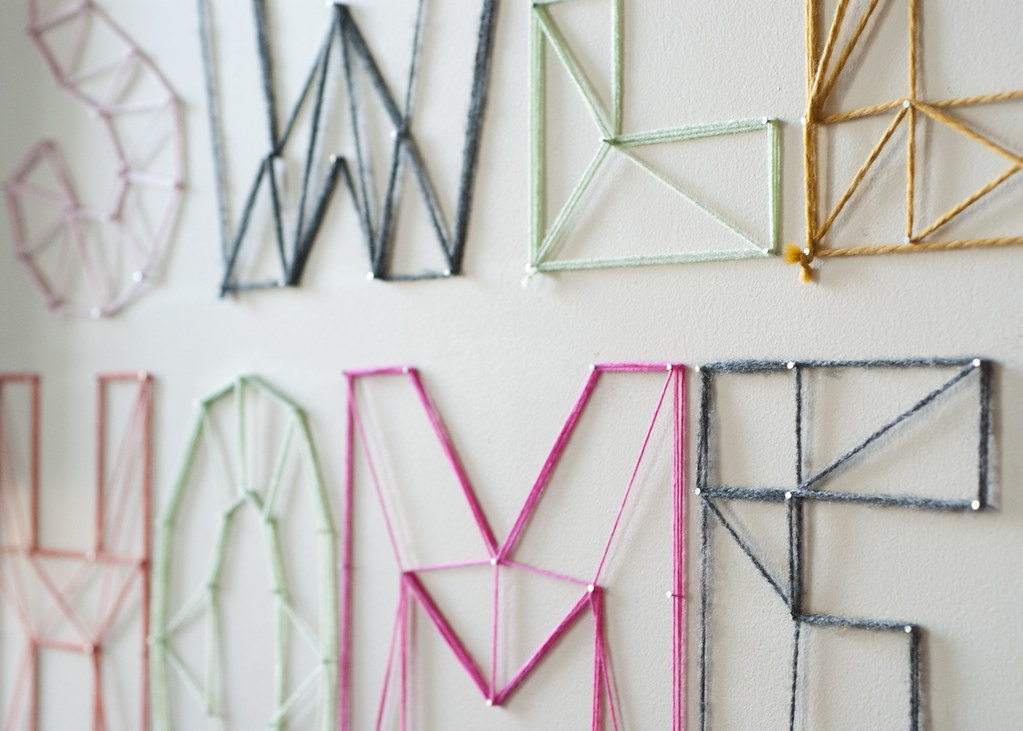
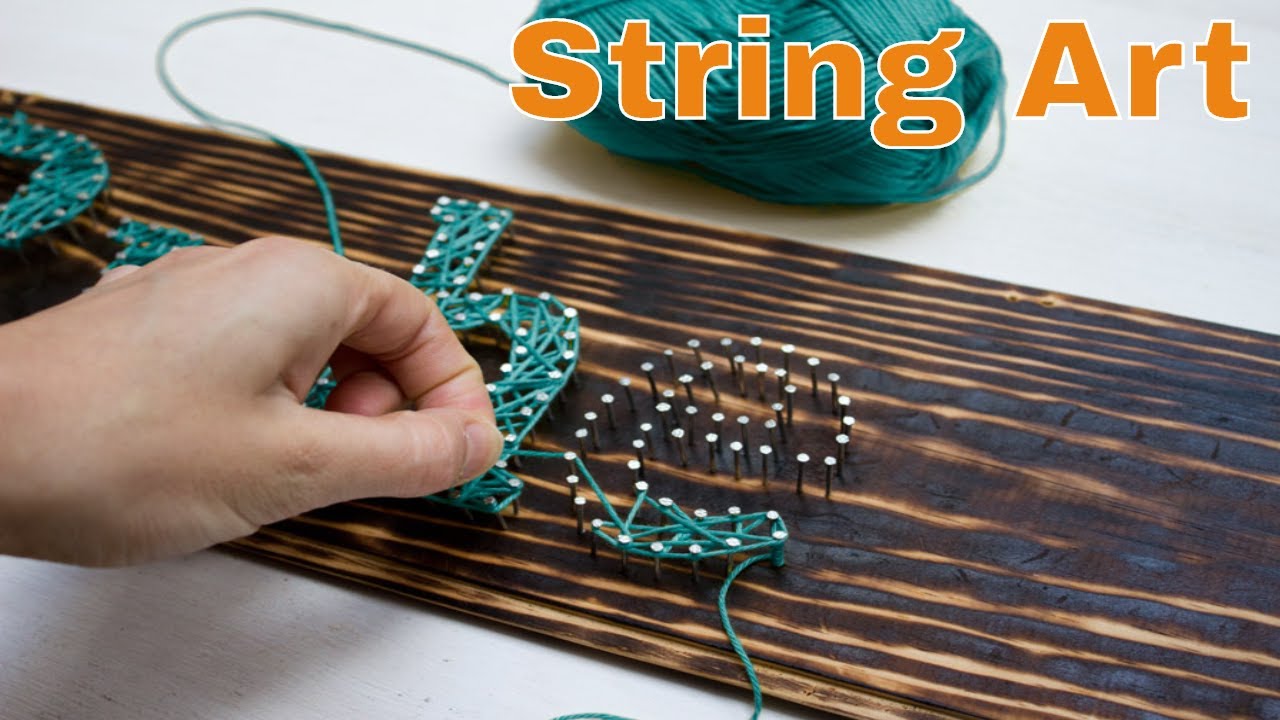
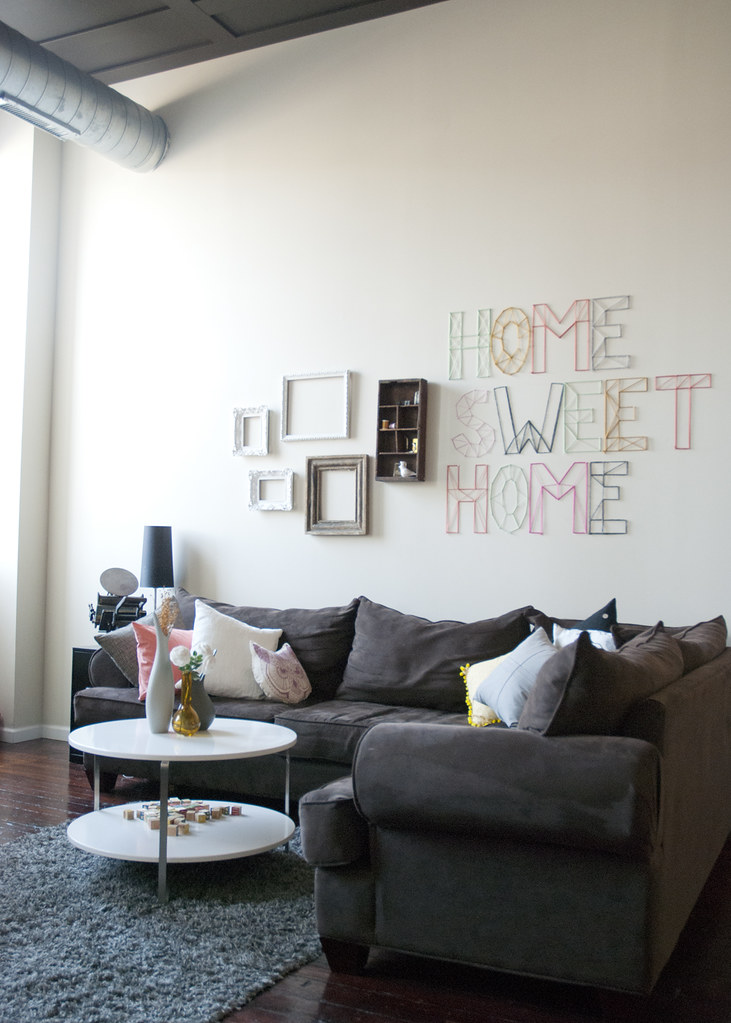
Diy nail and yarn wall art. Diy string art tutorial. I really didnt want to mess with hammers and cutting wood and all that though so i used cork board instead. 10 steps with pictures regarding nail and yarn wall art image 13 of 20. My system was to tie off the first nail string every third nail or so work my way back around a few times to catch all the gaps and give it a slightly erratic look and then add a tiny dab of hot glue where i tied off the string on the last nail of each letter.
Diy decor gives us the freedom to create customized pieces that fit our style color scheme and personalities. Find and save ideas about yarn wall art on pinterest. Diy nail and yarn wall art pictured try this fun and wallet friendly yarn wall art from jen loves kev. Diy nail and yarn wall art jen loves kev throughout nail and yarn wall art image 12 of 20.
Diy string art tutorial. Add intrigue to your walls with a few nails and the remnants of your favorite skeins. This diy string art christmas tree brings two important points to light. On the wall diy yarn art projects.
I wanted the string pattern in each letter to be different. Ive been seeing tons of string art popping up all over the web and decided to try my hand at a piece of my own. With this diy string art tutorial you can now create wall art that shows off your home state. Diy nail and yarn wall art.
Diy string art tutorial. See more ideas about yarn wall hanging wall hangings and diy wall hanging. Details at my poppet. Then nail the nails in the corners and around the curves of each letter.
10 steps with pictures regarding nail and yarn wall art image 14 of 20. The fact that yarn art is perfect for the creation of angular geometric forms and the fact that using a non permanent adhesive such as 3m decorating clips can make the wall art a lot friendlier for renters. Add intrigue to your walls with a few nails and the remnants of your favorite skeins.
Diy Nail And Yarn Wall Art Jen Loves Kev

Transform Your Walls With 22 Big Wall Art Diys Id

Img 5992 Diy String Wall Art Yarn Wall Art Diy Room Decor

Diy Nail Wall Art Deer Nail Art Designs Sunflowers

Diyyarnwallart1 Diy Decor Yarn Wall Art Diy Wall Art Diy Wall

Diy Yarn Wall Hanging Oversized Boho Tapestry Tutorial
Diy Nail And Yarn Wall Art Jen Loves Kev
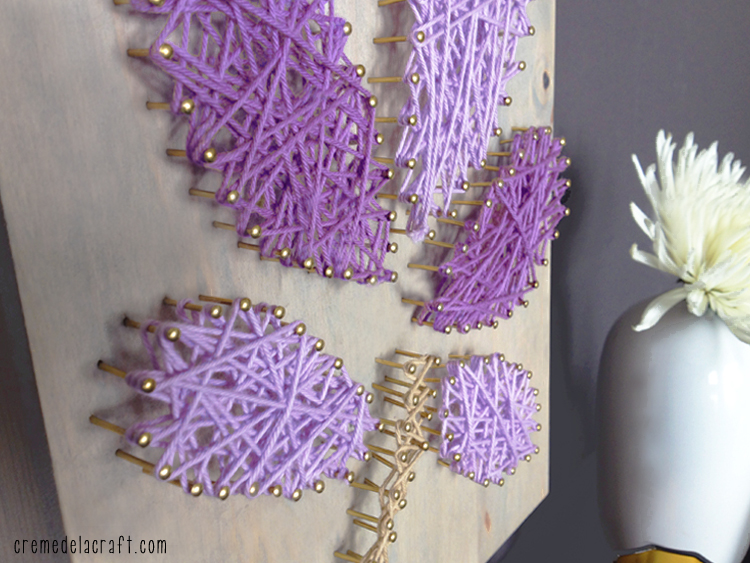
Diy Wall Art From Yarn Nails

Diy String Art Tutorial 10 Steps With Pictures

Want To Copy Wall Art With Yarn At Anthropologie Things I Want
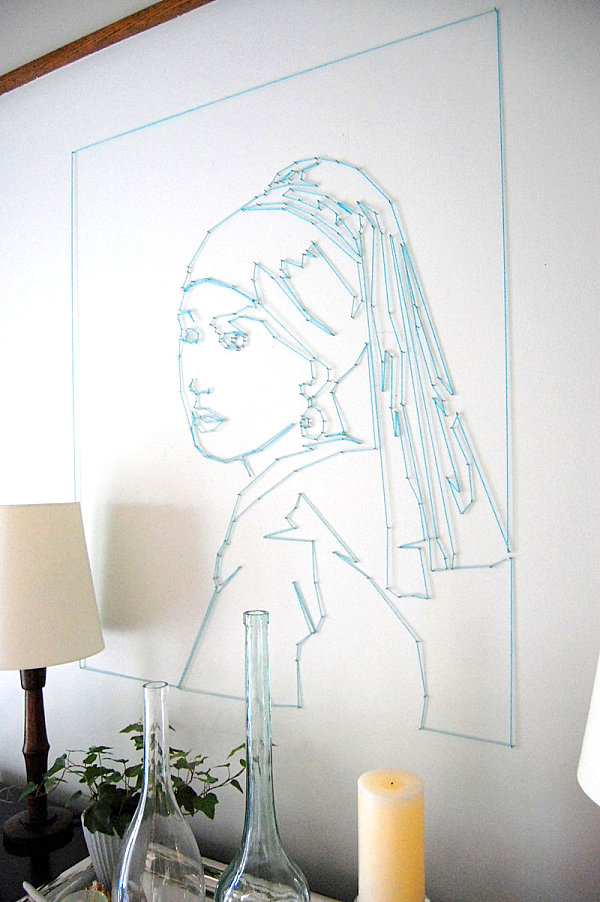
Diy String Art Diy String Art Tutorial String Art Letters
Thread And Nails 16 String Art For Original Interiors

Diy Yarn Wall Hanging Tutorial Michelle Phan Michelle Phan
Diy Nail And Yarn Wall Art Jen Loves Kev

Easy Yarn Wall Art Diy A Beautiful Mess
10 Diy Yarn Art Ideas For A Creative Touch

Semi Diy State Nail And String Art Semi Diy
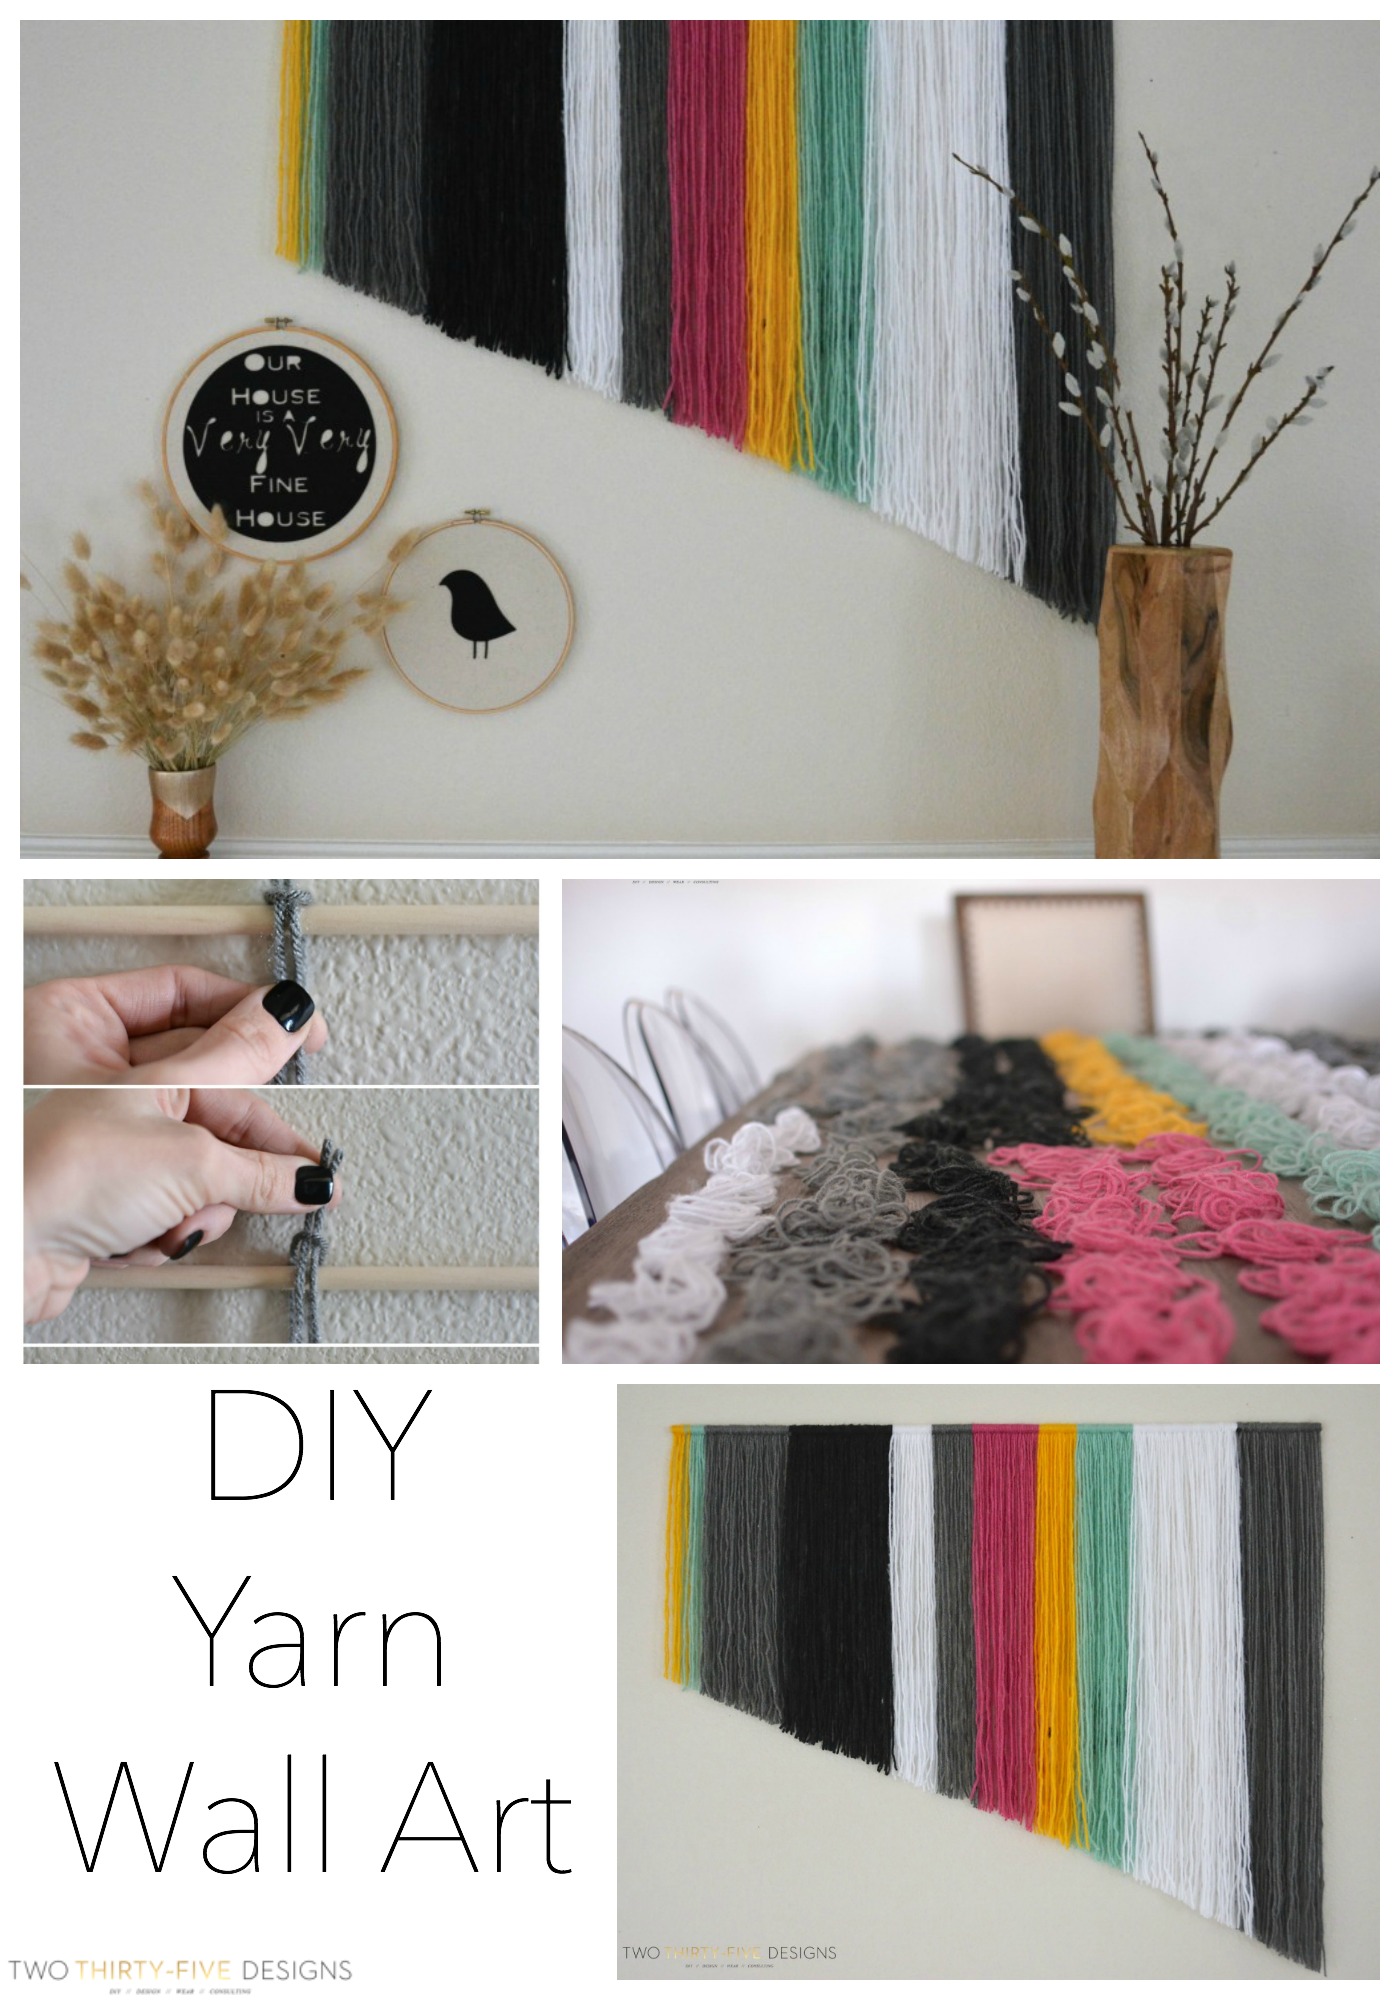
Diy Yarn Wall Art Two Thirty Five Designs

Nail Wall Art Ronniebrownlifesystems
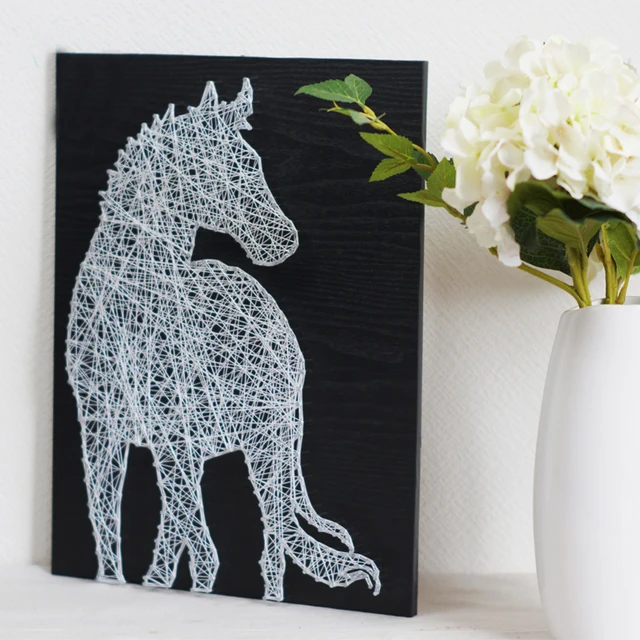
String Art Diy Kit White Horse 3d Yarn Wall Art Home Decoration

Diy Yarn Wall Hanging Oversized Boho Tapestry Tutorial
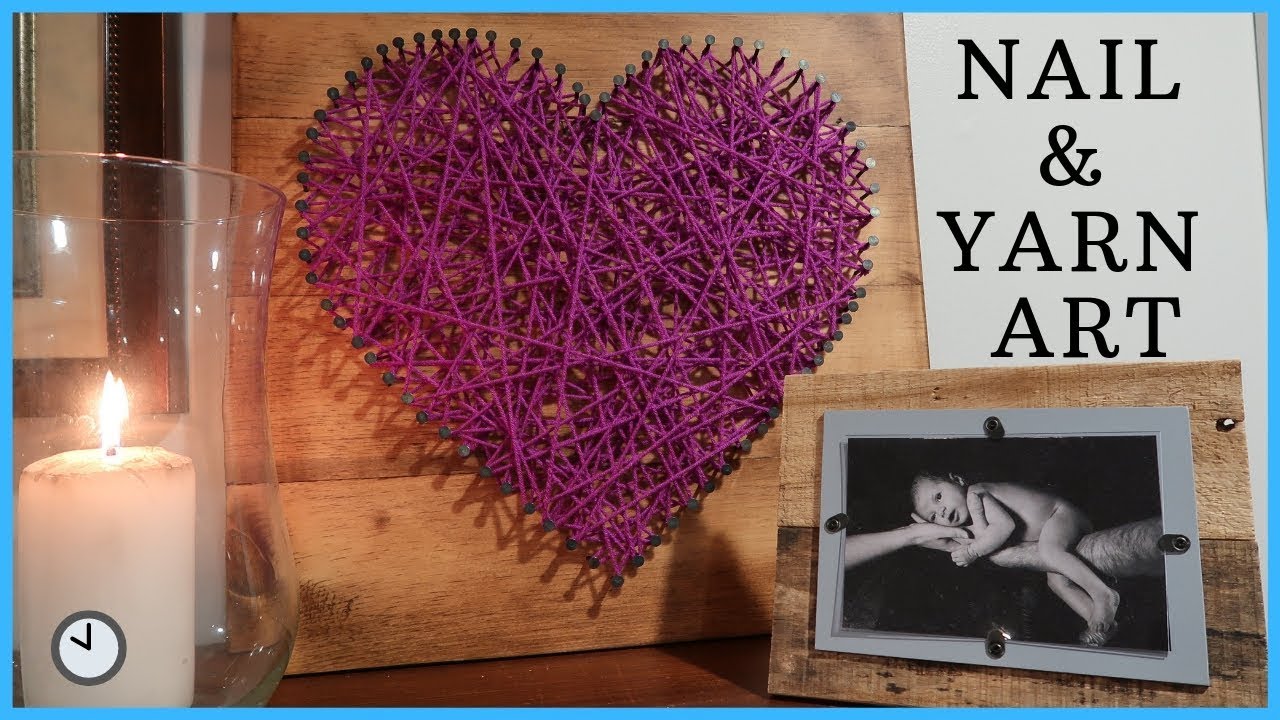
Nail Yarn Art Diy Heart Yarn Wall Art Stuff Moms Have Time For
:max_bytes(150000):strip_icc()/string_art-3--56a491f33df78cf772830550.JPG)
String Art Step By Step Tutorial

Diy Personalized String Art Tree

Yarn Wall Art Yarn Wall Art Use Nails Or Fancy Aluminum Pegs
Diy Nail And Yarn Wall Art Jen Loves Kev

