How To Do Nail Art In Water
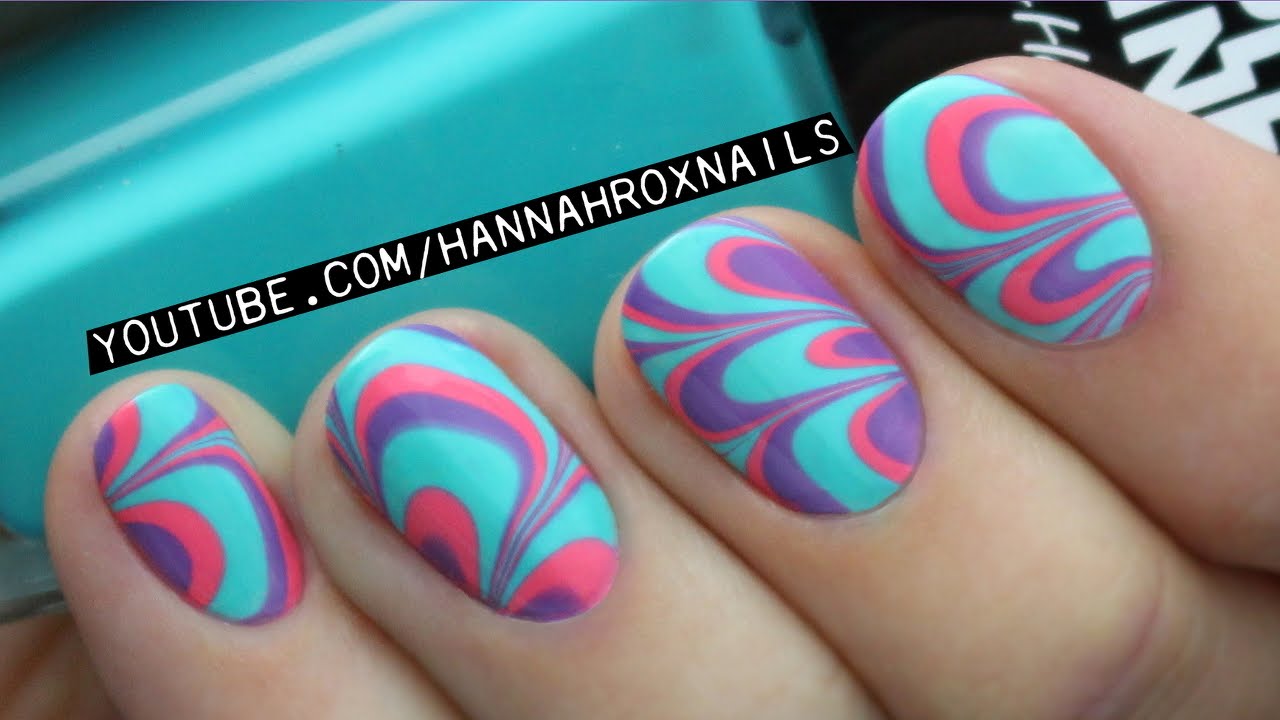
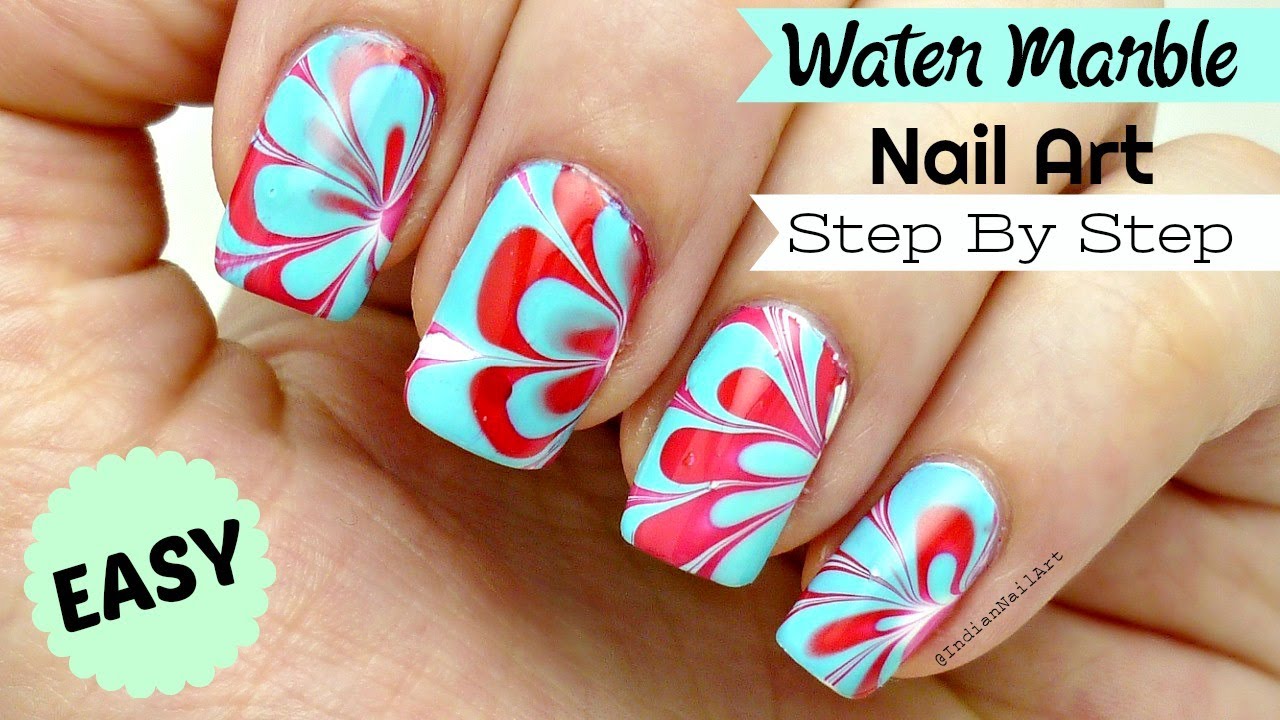
Water Marble Nail Art Youtube
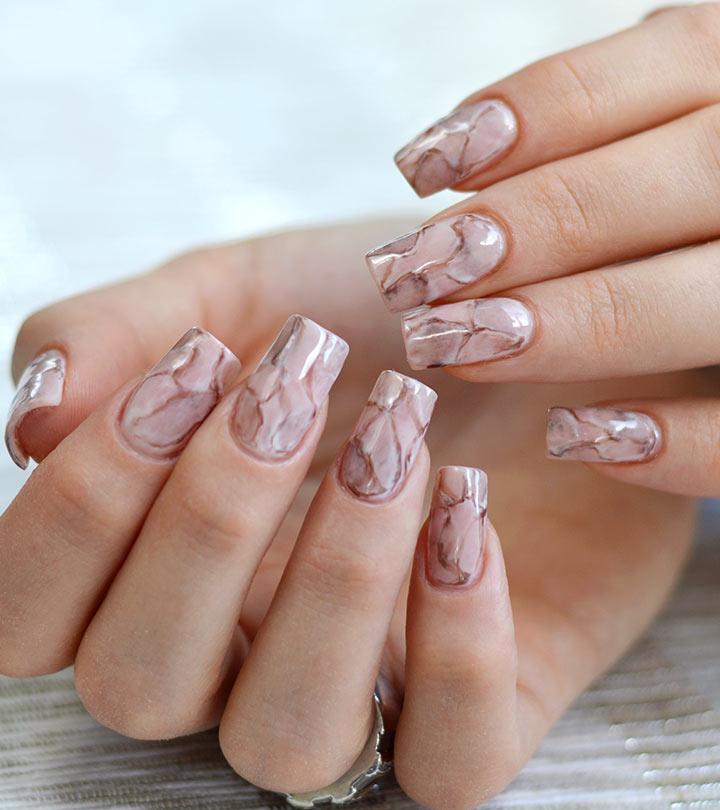
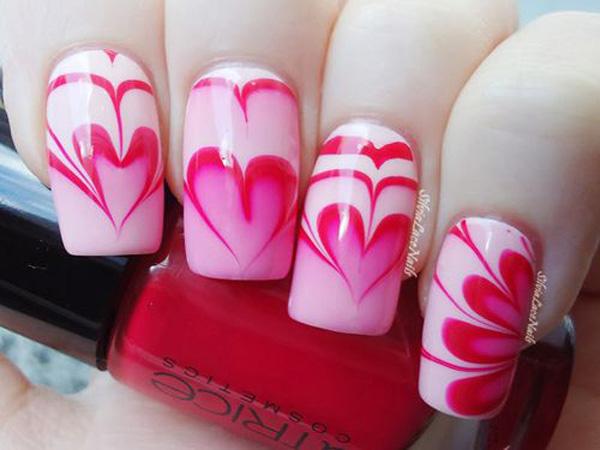
Wonderful Diy Amazing Water Marble Nails

No Mess Watermarble Tutorial By Manna S Manis Watermarble
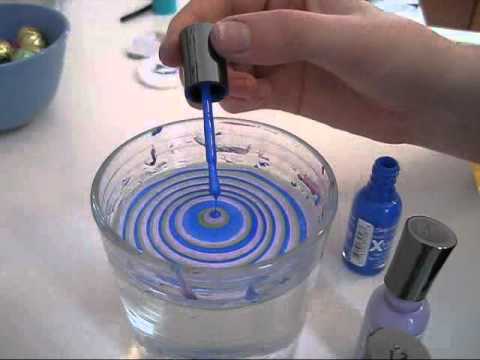
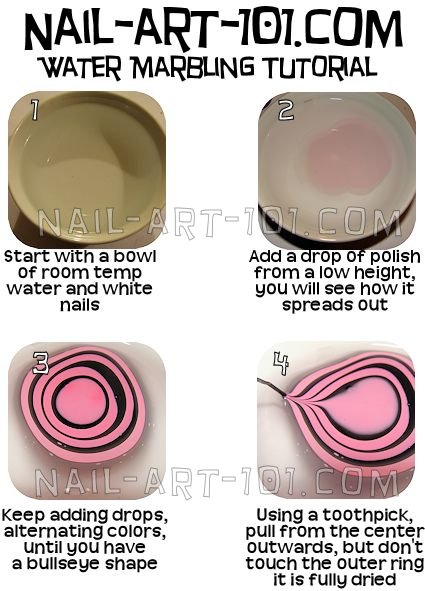
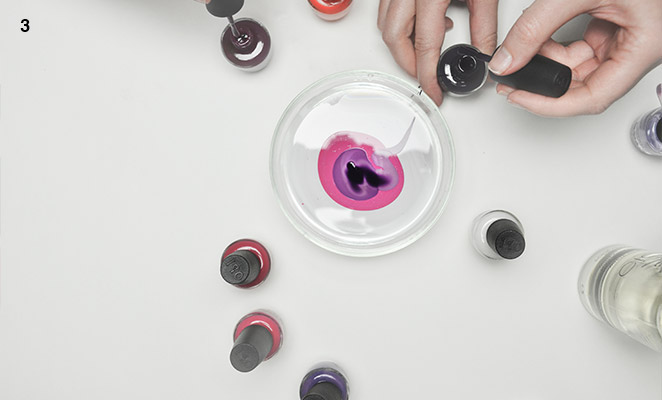
To create a marble nail effect using water start by filling a cup with room temperature water and dripping 1 drop of nail polish onto the surface of the water.
How to do nail art in water. The basic toolsmaterial you will need include. Once the polish spreads out into a circle place a drop of polish in another color on top and swirl a toothpick through the circle to create the marble effect. If you have everything proceed to do nail art in water. 1 white nail polish.
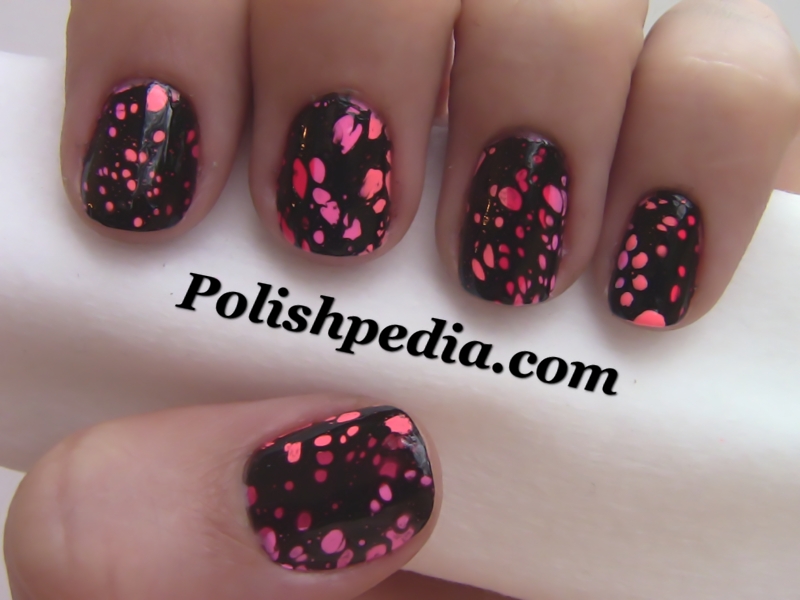
A fun design for the water droplets is a cloudy sky design. At least 2 bottles of nail polish of different color each. First you would need to choose a blue base coat. Dab the cotton ball onto your nails to create the look of a cloudy sky.
After that rip off a small piece of a cotton ball. For full nail water decals you have to cut a piece equal to or a little larger than the size of your nails. Carry on the pattern in this way. Drip polish in the water.
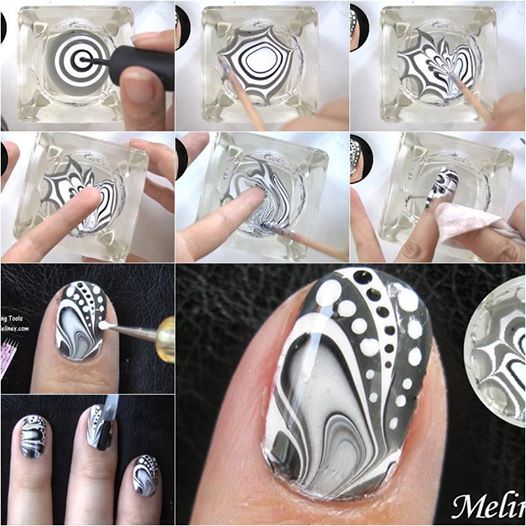
1 glass of water or any other container eg a small bowl filled with water. Add a second colour in the same way into true middle of fat colour. Then take another color and drop another droplet of that shade into the center of the. Cut over the cuticles make the shape you want and polish the nails.
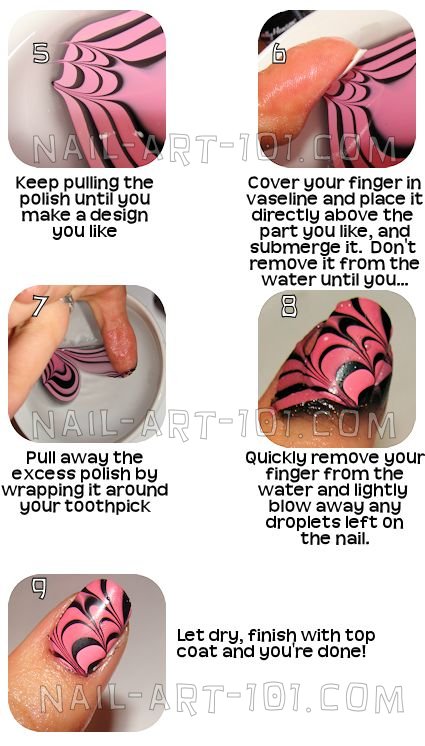
Put the decal in the water bowl. When you remove your finger from the bowl there should be no more excess polish. Gently tap the handle of the brush until the varnish drips into the water. Hold it 1 cm above the centre of the waters edge.
Make sure you take a toothpick to the excess nail polish in your cup or bowl while your nail is still submerged. Apply the transparent polish. Dip the piece of cotton into white nail polish. You should choose bright and contrasting colors as you can get an amazing effect.
Do usual hygienic manicure. Take your small glass of water and add a drop of polish from the brush into it. A base coat optionally a top coat. Put some nail varnish on the brush.
If it is a little large leave the overlap as it is and dry off the water completely from your nails.

Nail Art Tutorial Water Marble Decals Nail It
Diy Water Marble Nail Art With Salon Quality Results
Water Marble Nail Art Tips Tricks Youtube
Top 10 Water Marble Nail Art Design Tutorials Pictures For 2019

How To Do Water Marble Nail Art At Home Tutorial Fashion Vials
How To Do Easy Water Marble Nail Art Step By Step Tutorial In Hindi
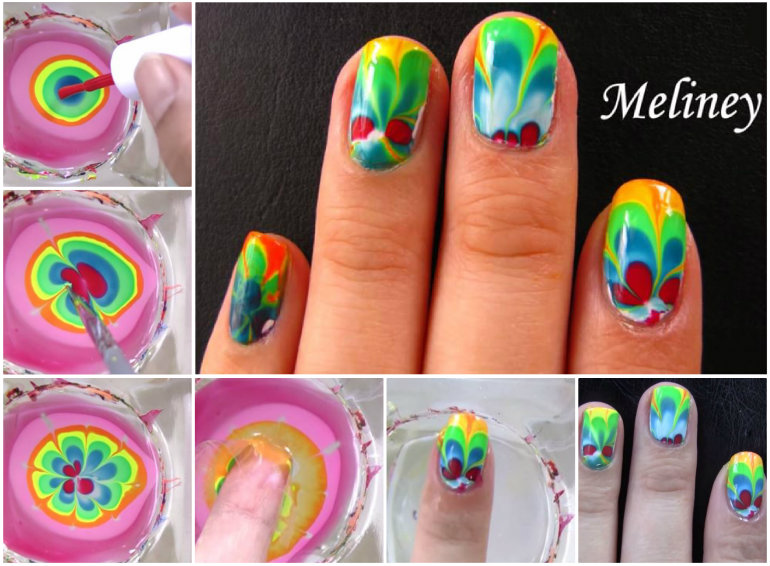
Wonderful Diy Rainbow Marble Nail Art

Nails Ideas Endearing How To Do Water Marble Nail Art Step By How

Nail Art Tutorial How To Make Water Marble Decals Nail It
How To Do Water Marble Nails

How To Do Water Droplet Nail Art 11 Steps With Pictures

No Mess Water Marble Nail Art Applique And Creative Water Marble

Diy Water Marble Nail Art Tutorial How To Instructions
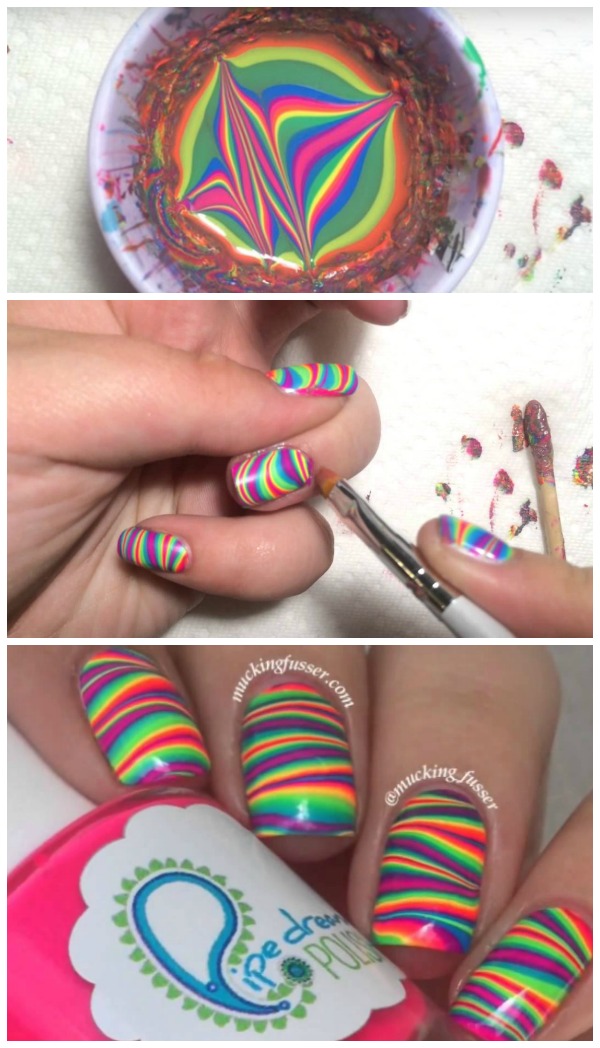
Diy Striped Rainbow Water Marble Nail Art

Water Marble Nail Art Diy Projects Craft Ideas How To S For Home

Four Easy Water Marble Nail Art Designs Youtube

Nail Art Designs Water Marble Nail Art Tutorial Enchanted Forest

How To Get Water Marble Nail Art At Home Stylecaster

Nail Art Tutorial Feather Water Marble Nail It

Water Marble Nail Art 13 Steps With Pictures
35 Water Marble Nail Art Designs Art And Design
Diy Water Marble Nail Art With Salon Quality Results

Flower Marble Nails Blobbicure Dry Water Marble Nails Technique

Pink Nails Splendid How To Do Water Marble Nail Art Steps On How To
Water Spotted Nails Polishpedia Nail Art Nail Guide Shellac

Water Marble Nails How To Finally Master This Nail Art Technique

