How To Do Water Nail Art
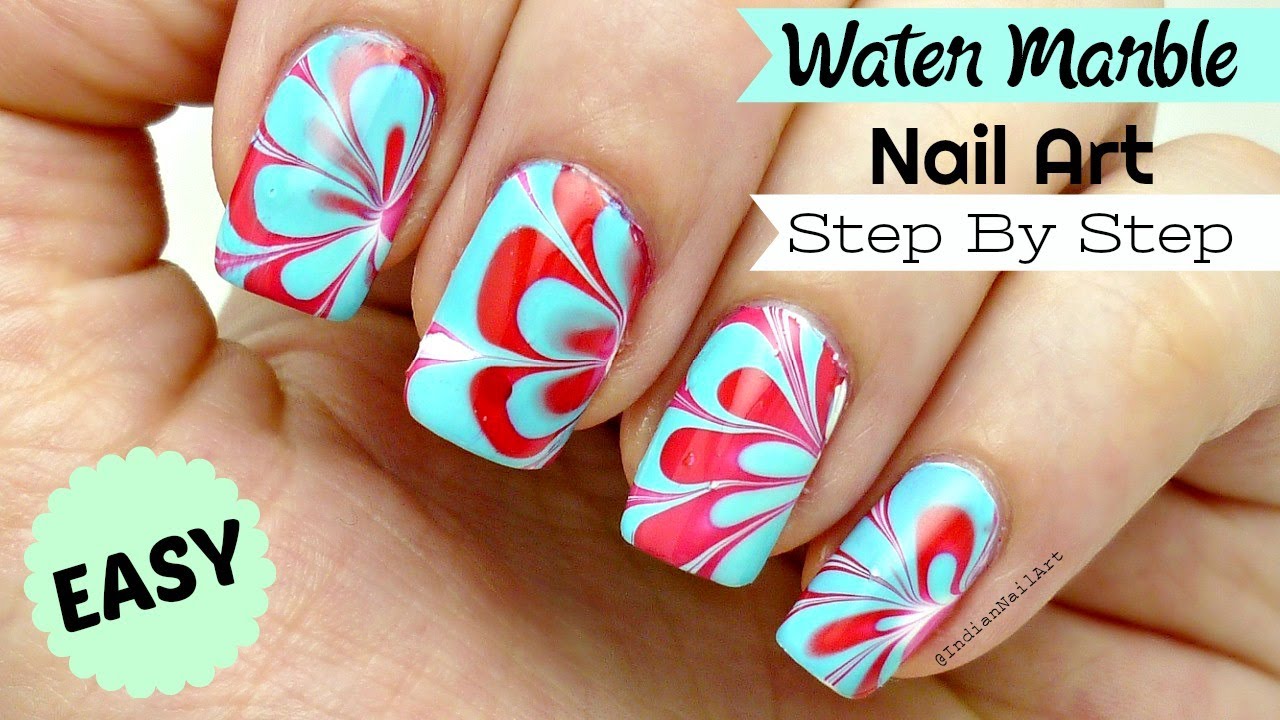
Top 10 Water Marble Nail Art Design Tutorials Pictures For 2019
Water Marble Nail Art Tips Tricks
Water Marble Nail Art
Apply a clear matte top.
How to do water nail art. Spray with fast drying spray if you want. Base coat also acts as a barrier between the polish and your nail protecting the area from damaging effects such as yellowing or brittleness. Apply a clear matte polish. Put sticky tape around your skin and cuticles.
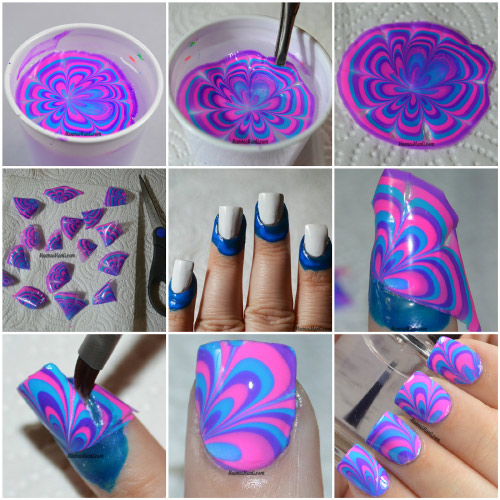
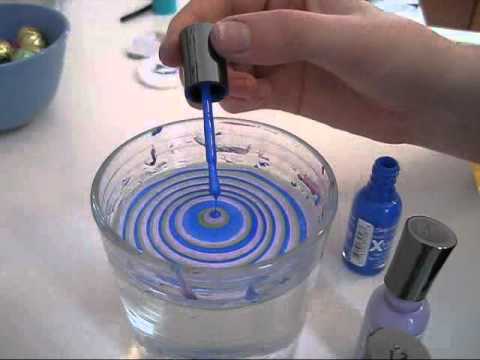
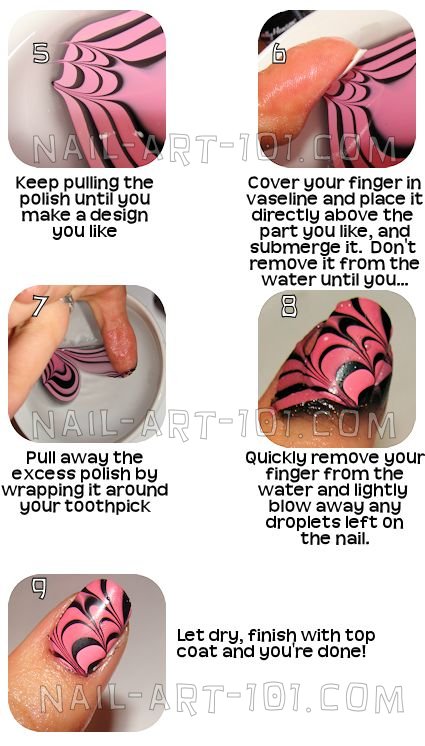
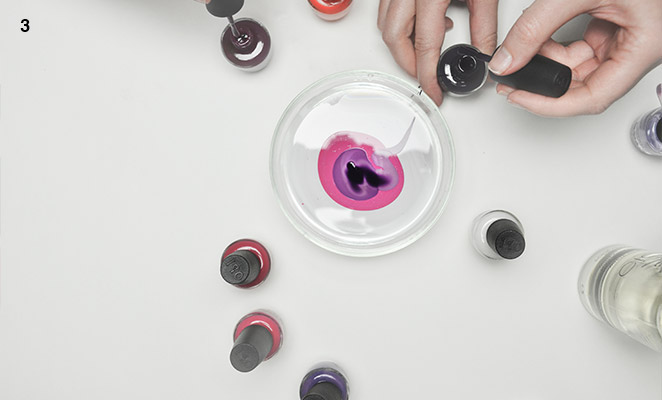
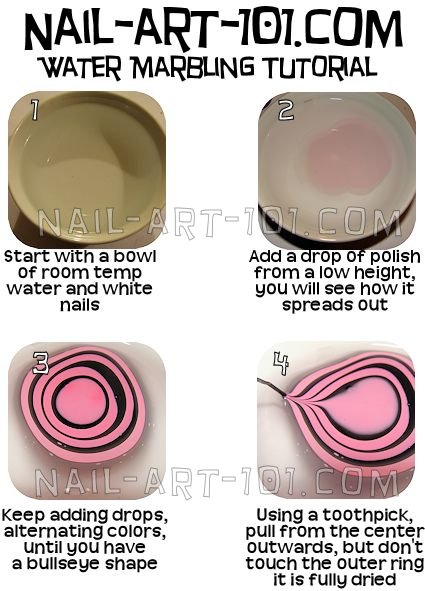
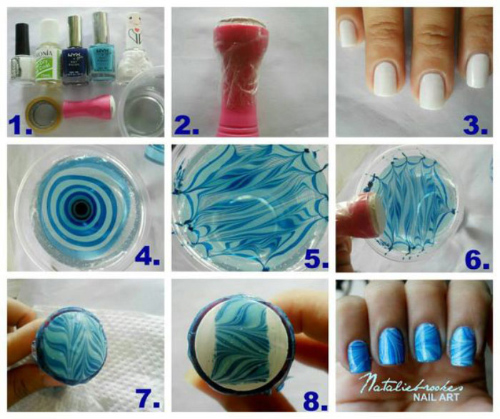
Cut over the cuticles make the shape you want and polish the nails. Do usual hygienic manicure. Choose a small cup. Fill the cup with room temperature water.
How to create a marble nail effect using water part 1 preparing the marbled water apply a base coat to your nails. All looks are very simple and easy to do. This is the second installment of my water marble nail art tutorial. If you have everything proceed to do nail art in water.
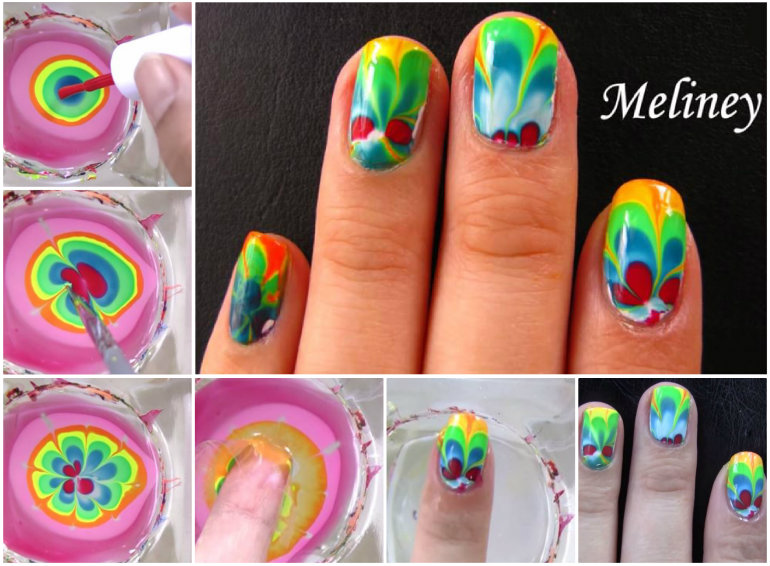
Choose your tool to create the droplets. Apply the transparent polish. I recommend 2 coats. Apply a base coat to clean nails to smooth out rough areas.
Water marble nail art step 1. Get clear nail polish. This step will also prolong the life of your manicure so you can show off your artwork for longer. How to do water droplet nail art paint a base coat.
Begin building up the droplets. Allow the nail polish to dry. Start with a base. Fix any problem areas.
Paint your nails with a clear base coat. This video includes strips flower and spider web designs. All the nail polishes that. Paint your nails with the white nail varnish.
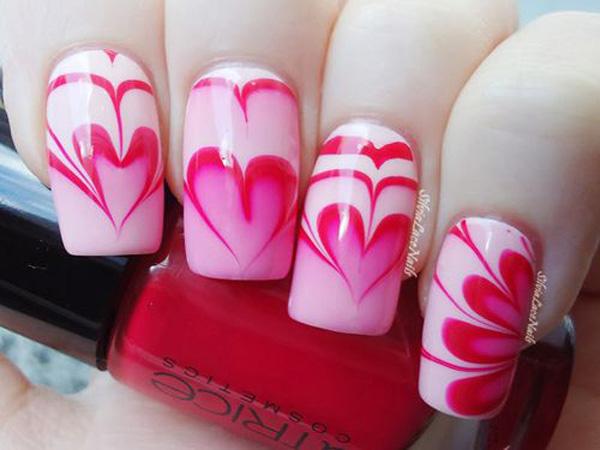
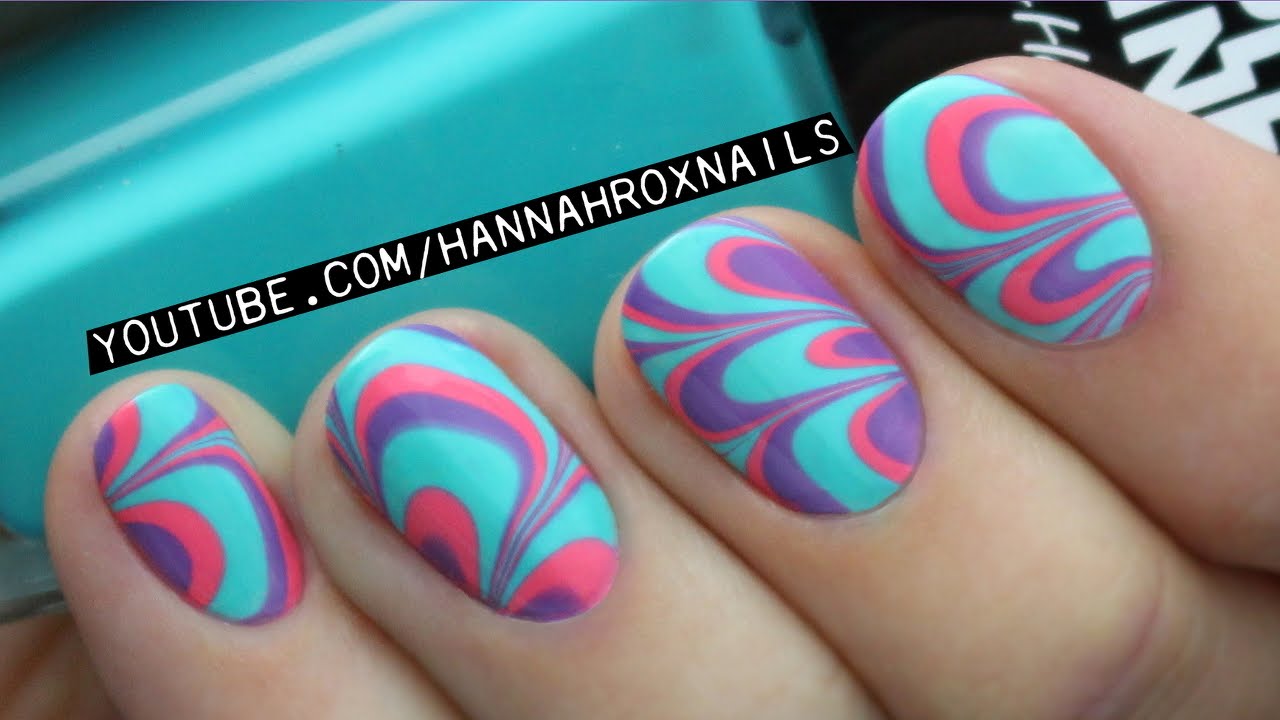
You should choose bright and contrasting colors as you can get an amazing effect. Water marble nail art.

Nail Art Tutorial Water Marble Decals Nail It

How To Make Amazing Water Marble Nail Art Diy Tutorial Creative
How To Do Easy Water Marble Nail Art Step By Step Tutorial In Hindi व टर म र बल न ल आर ट
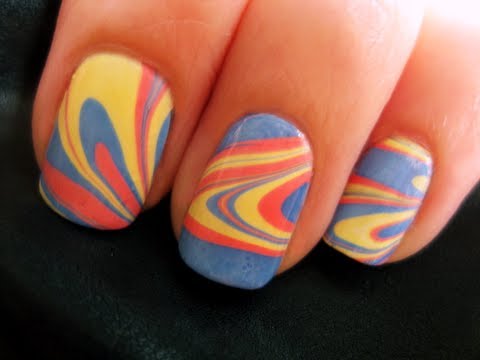
Water Marble Nail Art
Top 10 Water Marble Nail Art Design Tutorials Pictures For 2019
Diy Water Marble Nail Art With Salon Quality Results

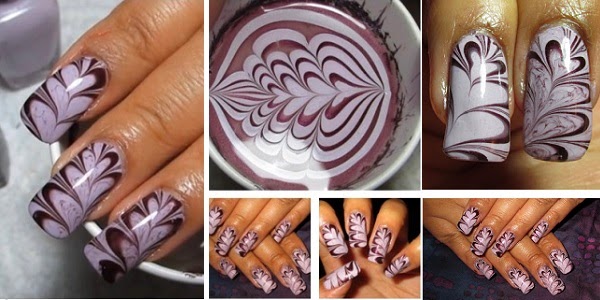
Nail Art Tutorial Feather Water Marble Nail It
How To Do Water Marble Nails

No Mess Water Marble Nail Art Applique And Creative Water Marble
Wonderful Diy Rainbow Marble Nail Art

How To Do Water Droplet Nail Art 11 Steps With Pictures

Water Marble Nail Art Diy Projects Craft Ideas How To S For Home
Diy Water Marble Nail Art With Salon Quality Results
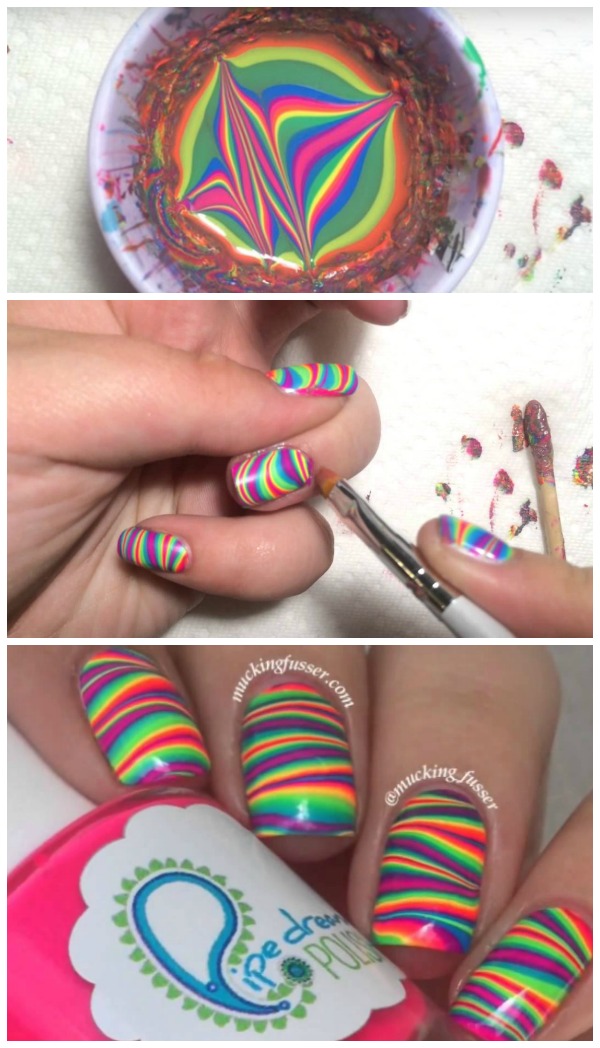
Diy Striped Rainbow Water Marble Nail Art

How To Do Water Marble Nail Art At Home Tutorial Fashion Vials

Water Marble Nail Art And Water Marble Nail Art Ideas Water Nail Art

Diy Water Marble Nail Art Tutorial Pictures Photos And Images For
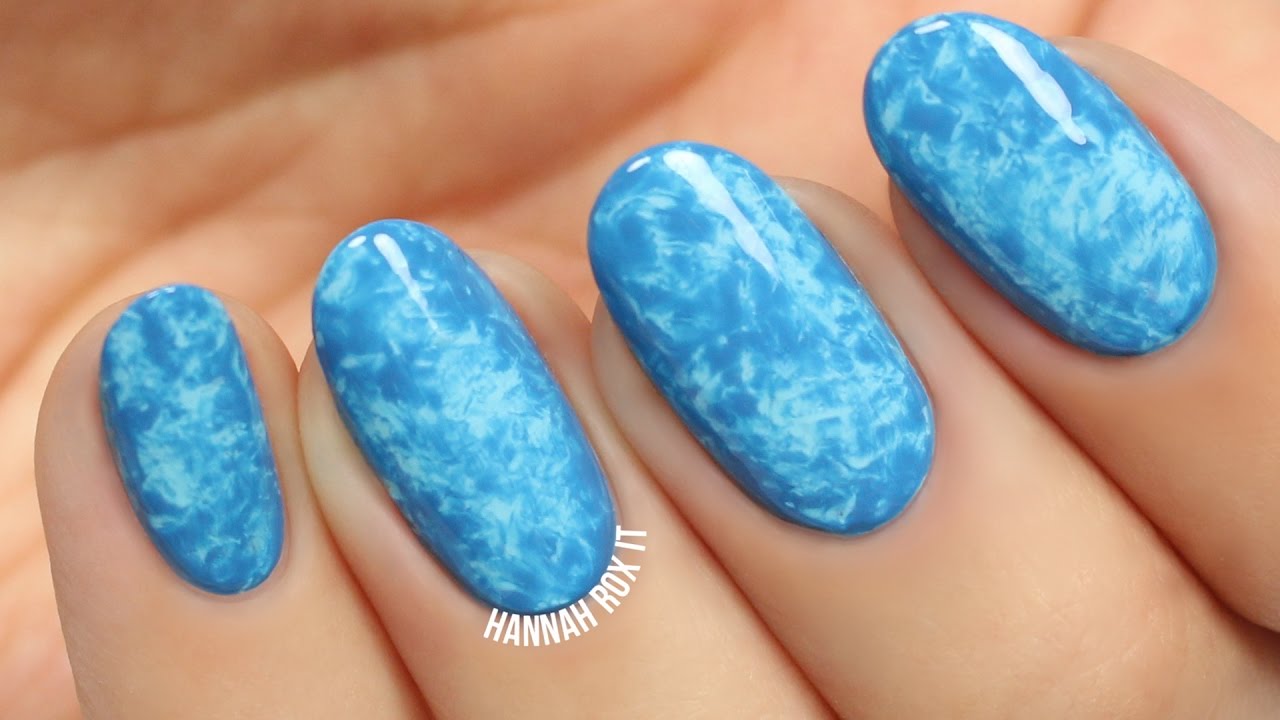
Easy Pool Ocean Water Nail Art
Top 10 Water Marble Nail Art Design Tutorials Pictures For 2019
Diy Water Marble Nail Art With Salon Quality Results

This Less Messy Water Marbling Technique Involves Stamping With A

Nail Art Tutorial How To Make Water Marble Decals Nail It

How To Get Water Marble Nail Art At Home Stylecaster

Four Easy Water Marble Nail Art Designs

In Depth Water Marbling Nail Art Tutorial Lacquerheads Of Oz

Water Marble Nail Polish Makeup Nails Hair Water Marble