Water Nail Art Instructions

Nails Ideas Delectable Instructions On How To Do Water Marbling How

Diy Water Marble Nail Art Tutorial How To Instructions

Water Marble Nails Tutorial With Step By Step Instructions And Good

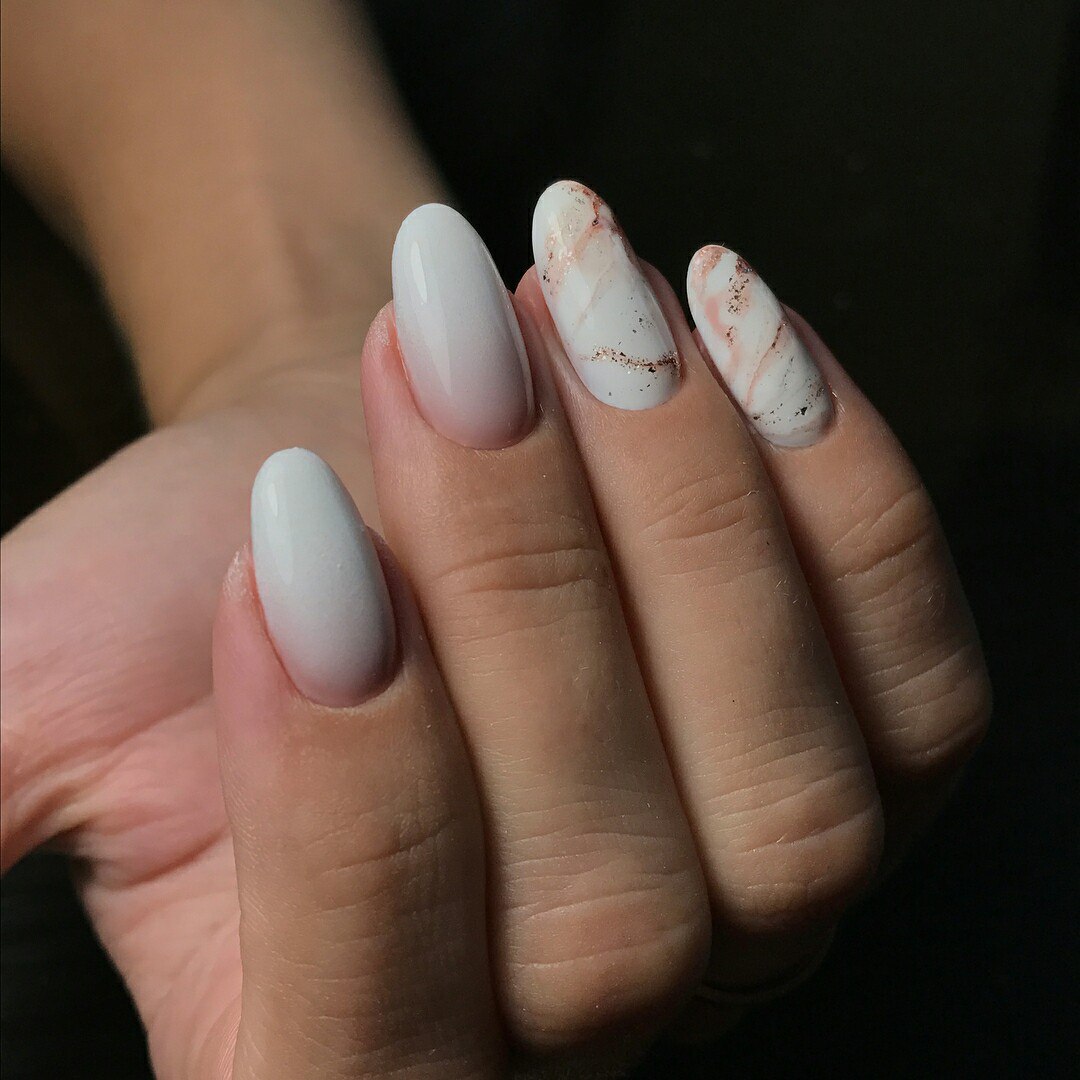
The swirled nail polish will adhere to your nail giving you a marble design right on your nail.
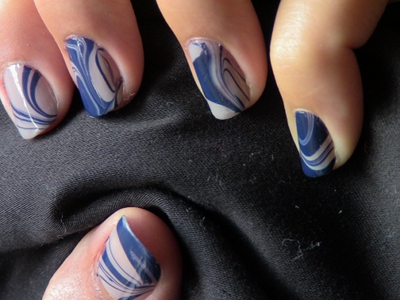
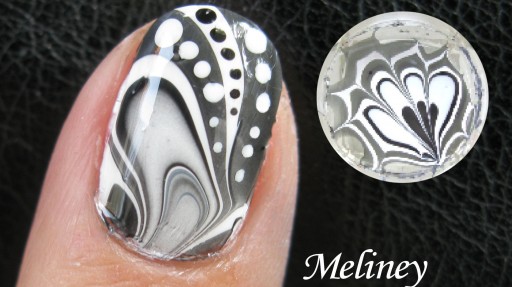
Water nail art instructions. Instructions for applying rlr creations waterslide nail art decals fingernail and toe instructions 1. It looks really tricky but its simple once you know how to do it. A water slide decal is a pattern or image large or small which is printed on a special paper. You can create your very own marble nail design by dropping nail polish onto water dragging a point through the circles of polish and then inserting your nail.
To create a marble nail effect using water start by filling a cup with room temperature water and dripping 1 drop of nail polish onto the surface of the water. Back to nail decal store. Once the polish spreads out into a circle place a drop of polish in another color on top and swirl a toothpick through the circle to create the marble effect. Paint your nails any color light colors work best but any polish will work with my designs.
Keep reading and ill. Cut each decal out as close to the image as you can. Water nail art can be boldly called a novelty in the world of nail art. When it is put into water a layer between the image and the backing paper dissolves allowing the image or pattern to slide off which can then be transferred to your nail or any other surface.
You can use your marble nail design on your natural nails or on acrylic nails. All you need is nail polish and water to do it. In this instructable ill be showing you how to do this amazing nail art. It has become unbelievably popular in a short time.
To do it you dont need some special expensive tools.

Nails Ideas Endearing How To Do Water Marble Nail Art Step By How

Water Marble Nail Art Designs Tepaksirehblog Com

Diy Rainbow Water Marble Nail Art Tutorial Diy Tag

Color For Cccccc Tutorial Striped Water Marble Mucking Fusser

Wonderful Diy Nail Polish Flowers Nail Stuff Water Marble Nail
Water Marble Nail Art Polishpedia Nail Art Nail Guide Shellac

Water Marble Your Nails Perfectly Youtube
Water Nail Art How To Do Water Marble Nail Art Ladylife

Nail Design Instructions Tepaksirehblog Com

Diy Super Cute Mouse Nail Art Water Transfer Stickers Eclat De Paris

Nail Art Kit Tuttle Publishing
How To Paint Black White Water Marble Nail Art Manicure At Home

How To Paint Colorful Hippie Flower Power Design With Water Marbling

Tutorial Water Spotted Nail Art Technique Sheknows
33 Cool Nail Art Ideas Awesome Diy Nail Designs Diy Projects For

Amazon Com 48 Sheets Mixed Nail Art Stickers Akwox Nail Art Water

Starbucks Nail Decals Water Decals Nail Art Decals Starbucks Nail

2015 Nail Art Tutorials To Do At Home Page 7 Inspiring Simple
%2C445%2C291%2C400%2C400%2Carial%2C12%2C4%2C0%2C0%2C5_SCLZZZZZZZ_.jpg)
Amazon Com Japanese Geisha Nail Art Water Transfer Decal 15pcs By

Rainbow Rose Nail Art Blue1 One Pack Of Water Decals Included
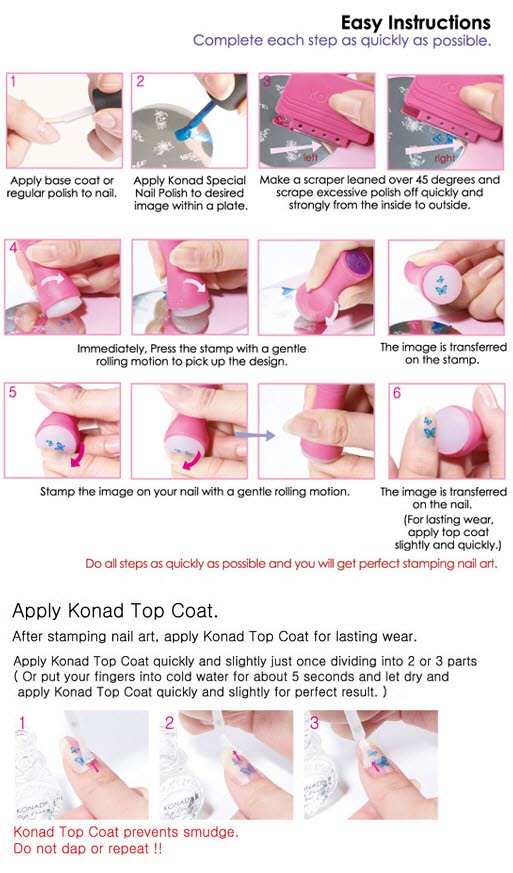
Instructions Tips Tricks

24 Styles Nail Sticker Marilyn Monroe Nail Art Water Decals Audrey

Nail Art Black Smoke Marble Long Square Tip Nails Tutorial Water

Nail Art Nicole Diary Water Decals Polish And Paws

Black White Water Slide Nail Art Nail Decal Sheets 48 Sheets

Nails Ideas Best How To Do Marble Nail Art Without Water How To Do